Have you ever put off doing something for a long time and then, when you finally did it, you asked yourself “why did I wait so long to do that?”
Well, that’s happened to me more than I like to admit. I just finished a couple of projects that I have been putting off and asked the same question both times.
One of these was of immediate and significant benefit.
Here’s the story.
Going back years to when we moved into our house in Brentwood, it happened that the house faced west. During summers, the sun beat mercilessly on that side of the house in the latter half of the day. 🌞🌞🌞 That, of course, included the garage doors.
The result was, the garage became very, very hot. Very uncomfortably hot! 🔥🔥🔥
Each summer, when this would happen again every day, I would say “I need to do something about this heat in the garage!” But the years went by and when we moved, I had not done anything.
When we moved into our new house in Rio Vista, it was in July. The sun goes down in the same place and the garage door faced the setting sun again.
The garage got almost unbearably hot! If I touched the inside of the metal roll-up garage door, the metal would be so hot, I could not touch it for long.
Also, the top row of door panels has little windows that let light into the garage. When the sun is just right, the light would stream directly in through the windows and everything the light touched in the garage would get even hotter.
Once again, I swore I would do something about this, but it was only recently that I did. That was three years after swearing to do it! When I was done, the results were so dramatic that I just had to say: “Oh man! Why did I wait so long to do this!”
Here’s what I did. After a little research, I decided my best option was to install foam panel insulation on the inside of the door panels. I found there are garage door insulation kits that I could get to do the job and good old Lowe’s happens to sell them. They’re called Insulfoam Garage Door Insulation Kits.
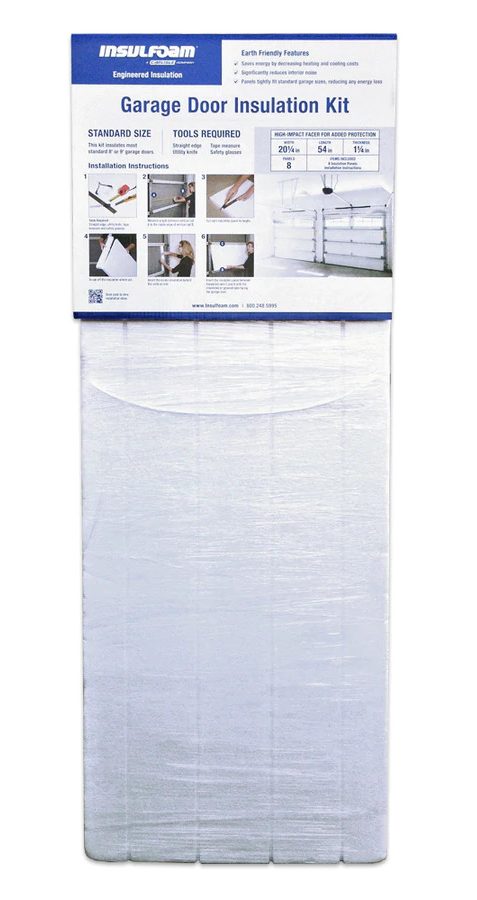
The kits are a set of ridged foam panels that are 20 ¼” wide x 54” long x 1 ¼” thick.
I found installation instructions online, which I downloaded and checked out. I also watched a couple of videos that supposedly show how to install these panels. Except for one detail, these all pretty much stunk. This I found out as I did the project. Once I had finished, I had learned the tricks to make it a lot easier. So, I will share those with you as we go through what happened.
After measuring the door panels, I determined I would need two of these kits. So, I head to Lowe’s and bring them home.
The thickness of the foam panels was just right to fit into the door panels. They had to be cut to fit the width and length just right. The upper and lower sides of the garage door metal panels have a lip.
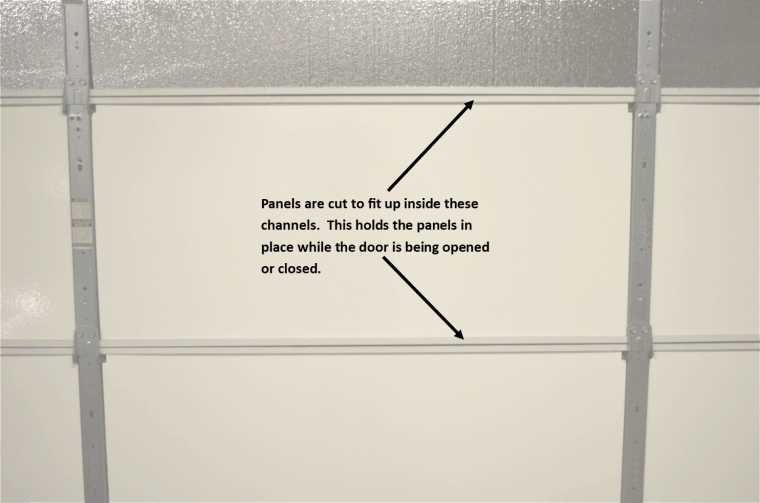
I found I had to cut the foam panel with enough foam to fit down behind these two lips. That’s what holds the panel in place while the door is going up and down.
The sides of the metal door panel don’t have a lip, so those ends of the foam panel need to fit flush.
The foam panels have an unfinished foam side and a side with a plastic sheet covering. The plastic side is supposed to go on the garage side of the panel once installed. Also, it is best to cut the foam with this side up.
The actual cutting of the panels had the most challenging learning curve. The foam is easily cut with a sharp cutting instrument. I had both fixed and retractable blade box cutters. They cut the foam easily but not enough to go all the way through. I could cut as deep as they would go and then break the foam in two, but that left areas of foam that had to be trimmed. It also caused those annoying tiny little foam balls to go all over the place.
Have you ever opened a package that included foam packing material and after removing the packing, you had tiny little foam balls all over the place? That’s what I’m talking about.
The one good idea in the video I watched, showed the person doing the cutting use a snap knife. That’s a box cutting type tool that has a very long cutting blade that’s partitioned into many sections. Its many blades joined into one long blade. The blade can be adjusted way out if necessary. Once any of the blade sections become dull, they can be easily snapped off using pliers.
I went to my local Ace Hardware and bought one of these knives.
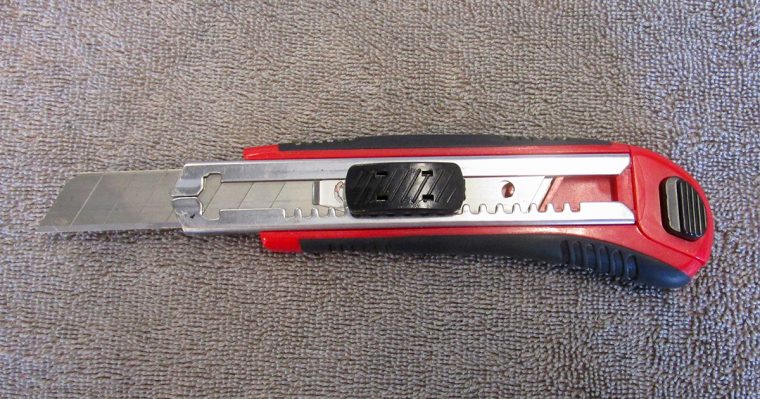
The snap knife could be adjusted to cut through the foam if you want to do that. There is significant resistance though. So, I tried working the knife with an up and down sawing motion. That worked but boy did it ever cause a lot of tiny balls of foam to go all over the place!
What worked the best was to make two passes without the sawing motion. Stick the blade about halfway down and make one cut, using a straight edge as a guide. Then go back and make another cut the rest of the way down. That worked perfectly!
I used two folding banquet tables to do the cutting on. I would lay the foam on a table and measure and draw my cutting line using a straight edge. Then clamp the straight edge on the foam on the tables placed so the cut would be between the tables. I could then run the blade through the foam on my second pass and not cut the table. This also held the straight edge and foam solidly, so there was no movement.
This process worked great!
Once I had installed all the panels on the portion of the door that did not have windows, it was time to deal with the top row that did have windows. I had not decided on how to deal with this yet, as I wanted to do the other panels first and get a feel for how the process worked.
Here was where the big problem was. The foam panels used so far were too thick to fit in the panels with windows. The windows are held in place by frames that are screwed to the door. The frames stick inside the panel and reduce the depth to ¾”. To use the foam panels in the kit, I would have to hollow out a portion of the foam enough to allow the window frames to fit while allowing the foam itself to fit into the lips of the door panel.
After trying to hollow out a panel, I decided this was not going to work. Way to difficult and way too messy.
I remembered there were other types of foam insulation at Lowe’s where I had loaded the garage door insulation kit and thought about going back there to see if any were the right thickness. It was getting late in the day though and I would have to go the next day.
Once the setting sun was hitting the door well, I went out and checked how hot the door and garage was. I was thinking maybe I would not have to deal with the window panels. The garage was still very hot. Touching the foam panels that were installed, revealed that they were still cool to barely warm. The window panels though were hot is all get-out and holding my hand over the window was hotter still.
So, it was going to take another trip to Lowe’s.
The next day, at Lowe’s, I found what I needed! It was R-TECH Premium Engineered Insulation. Ridged foam insulation 3/4” thick. Just the right thickness!
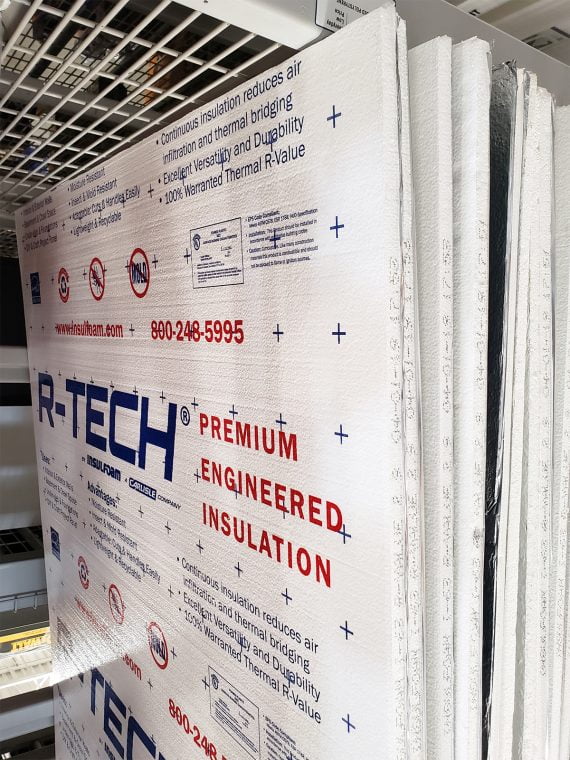
This insulation had a bare side and the other side covered in aluminum foil backing.
The only trouble was it only came in 4’ x 8’ sheets. Those won’t fit in my pick-up with the camper shell on it. So, I determined to cut the panels to a size that would fit in the truck in the parking lot.
After figuring what sizes to cut them and then get the right sizes home to cut again for the door, it turned out I would need two sheets.
I found out quickly that the parking lot cutting operation went O.K. but rolling the panels out to the truck on the lumber cart with the wind blowing hard like it was that day, is a real challenge! It wants to act like a sail and take you all over the place!
I was able to get the panels to the truck, unload them using the truck as a windbreak and cut the panels and load them. If I had lost my grip on one of those panels, it would have sailed over the store and out to the Highway 4 Bypass!
Once safely home, I was able to cut the new foam to the right size for the window panels. These were installed with the aluminum side facing inside the garage.
Once installed though, there was a new problem. I had been anticipating it but wanted to see how it would play out.
If you look at the photo of these panels again, you will see the unfinished side, that is the side that will be toward the outside of the garage, has all kinds of colorful writing, etc. on it. Once installed, the white of the foam and the colorful writing was easy to see from the street in front of the house.
That, of course, was not going to do!
So, I went down to the local Ace Hardware and got a can of flat black spray paint. I came home, removed the panels and measured where the windows would be and painted that part of the foam with the black paint.
Once the paint was dry, I re-installed the foam and voila! I could not tell there was anything behind the windows when I looked from the street!
That evening, when the sun was setting, I went into the garage and it was most definitely much cooler in there! Touching any of the panels revealed they were not hot at all!
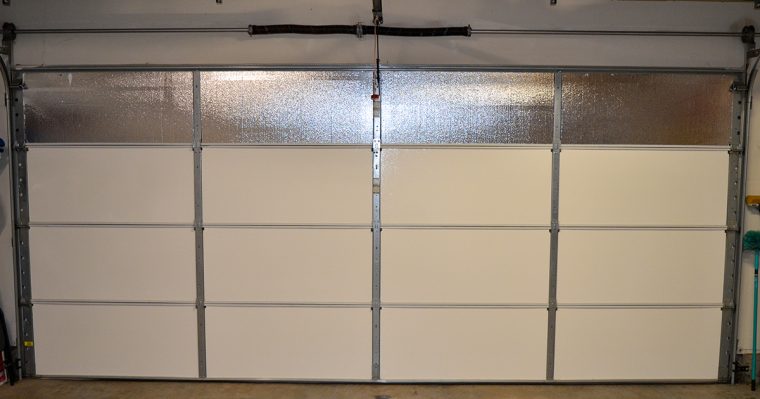
At that moment I repeated yet again: “Why, oh why, did I take so long to do this!”
There are a couple of other things to mention.
The weight of the foam panels does not affect the operation of the automatic door opener.
Also, even though I thought it would, the loss of light coming in through the door windows was not an issue at all. After all, all we have to do is turn on the garage lights to have plenty of light in there.
Did this little story give you any ideas?
Oh, one final thing! Interest rates are so low now, it might be time to make that real estate move you have been thinking about!
No matter what the real estate market, if you want the best possible chance to get what you want, call Libby at 925-872-6732. You’ll be glad you did!


Leave a Reply